Can I build a pool on a budget?
With summer just around the corner, now is the time to plan your dream plunge pool.
If you’re looking for cheap pool options then you may have considered a DIY pool. However a cheap pool doesn't mean you have to sacrifice on quality. Affordable pools are possible and just take a bit of extra research and the willingness to take on some elements of project management. Planning ahead and finding hints and tips to build the perfect pool will get you swimming in a beautiful pool in time for summer.
With the cost of living increasing, many people are putting travel plans on hold and opting to renovate their homes to create the perfect backyard retreat. A DIY plunge pool offers a wonderful opportunity to stay home and still have fun in the sun in your own backyard.
We’ve compiled a list of tips to get your dream plunge pool on a budget so you’ll be splashing in time for summer! We'll cover:
- Planning
- Quotes
- Pool Materials
- Installation
- Maintenance
1. Plan, plan and plan some more!
Planning your DIY plunge pool is an essential step that can save you both time and money in the long run. Having a plan ensures that you make informed decisions, avoid costly mistakes, and achieve the desired results.
Whether you're opting for a DIY project or hiring professionals, planning for your plunge pool on budget gives you a clear roadmap to follow, enabling a smooth and hassle-free pool installation process.
- The first item to check off is a Council permit. Each Council has different requirements so give them a call to get started.
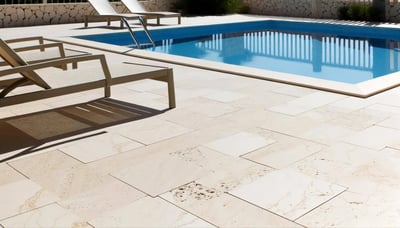
- Measure your space - what size pool will work well for your backyard? Think about lounging space, you want to have enough room around your pool to relax so allow room for sun lounges and chairs. A plunge pool is a great choice as it won’t dominate your garden so there’s still space for a grassed area.
- Think about timing - from permits to completed pool it can take on average 4 months so if you want to be swimming in the summer you need to kick things off well before.
2. Get Quotes (lots of them!)
If you’re opting to project manage the swimming pool build, then getting quotes from multiple trades will give you more of an idea about what to expect. It’s only when you talk to different trades that you get a clearer idea about the installation process and can start to compare inclusions. While it might be tempting to rush into the project and go with the first option you find, taking the time to gather multiple quotes is a smart move, a cheap pool installation quote may sound great, but delve into the details of what's been included. When it comes to an installer, each licensed pool installer may have different pricing structures, expertise levels, and services included in their packages. By obtaining quotes from several sources, you can make a well-informed decision based on a comprehensive comparison. This not only helps you find the most competitive price but also ensures that you're working with reliable and experienced professionals who understand your vision and can bring it to life.
If you’re project managing the install and coordinating the excavation company, installer and other trade professionals then you can save even more money. This DIY pool approach is more involved and you will need to obtain more quotes but it does increase your cost savings.
Top Tip: Check the builder/ installer is licensed and take the time to confirm their details
Plunge pools can be made in a range of materials but each comes with its advantages and disadvantages.
DIY Vinyl Liner Pool
At the cheaper end of the spectrum is a liner plunge pool. A vinyl liner pool is also known as a modular pool and is the easiest and quickest plunge pool to install. It is an above ground pool that consists of posts, panels and a liner to create a range of different pool sizes and shapes. This is the most budget friendly plunge pool as there is minimal excavation required. An advantage of this type of pool is that you can take it with you if you move house! However the disadvantages relate to the longevity of the materials and the overall look of the pool. The pool liner will need to be replaced every 6-10 years which needs to be factored in to the ongoing costs of this style of pool. Additionally, a liner pool isnt as aesthetically pleasing as an inground pool and doesnt add value to a property like an inground pool will.
DIY Fibreglass Plunge Pool
With a DIY fibreglass plunge pool you get all the benefits of an inground fibreglass pool at the fraction of the cost of a pool from a traditional all in one pool company. A fibreglass plunge pool will last 30 years and the materials used are renowned for their low maintenance properties. Fibreglass is a non porous surface so algae is not an issue like concrete pools so less chemicals are required. A fibreglass pool adds the same value to your home as a concrete pool so is a great option.
Pre Cast concrete pool
A precast concrete pool is a great option if you want the look and feel of a concrete pool but don’t want to wait for the long installation process of a custom built pool. With this option getting crane quotes is a must. As the pool is made from 100% concrete, the crane required to lift them is much more expensive than a fibreglass pool. A concrete pool also has the disadvantage of more chemicals needed to maintain the water chemistry and greater maintenance so this is the more costly of the plunge pool options.
4. Licensed Installer vs Full DIY
With a DIY plunge pool you have the option of engaging a licensed pool installer who can take care of every stage of the installation. Some installers will take care of the Council permits, excavations right through to the landscaping. This is a great option if you want to go down the DIY route and take advantage of savings but want to have a professional take care of all aspects. With Swimming Pool Kits Direct you can request the details of a local installer in your area who previous customers have used. With this option, you will still save money as you are able to get the pool shell and equipment at a reduced price by buying direct and also take time to get multiple quotes from installers. Having control of who installs your pool allows you to have greater confidence in the expertise of your installer and allows you to have more control over the installation process.
If you would like to take control of the entire project, a full DIY installation will lead to the greatest cost savings. By engaging a separate company to take part of each stage of the installation, you are able to gain multiple quotes and gain the best possible price. This option requires more work and attention to detail as you will need to organise the timeline of the installation and arrange for the correct trades at the right time but it’s a popular choice.
5. Maintaining Your DIY Plunge Pool on a Budget: Long-term Savings Strategies
It’s not just the initial upfront costs to consider with a DIY pool but also the ongoing maintenance. With any DIY plunge pool package, equipment is an important component. Every pool needs a pump, filter and chlorinator and the equipment you choose can have a big impact on your ongoing costs. When it comes to pumps, it can be tempting to go with the cheapest, however this can be costly in the long run. A single speed pump has a cheaper upfront cost compared to a variable speed pump, however the cost of the electricity to run a variable speed pump is significantly lower. The Maytronics Ecoclear variable speed pump offers 4 programmable speeds, allowing you to select the most efficient speed setting depending on your filtration, cleaning and water feature needs. With a single speed pump it will always operate at the maximum speed of a variable pump and so will draw more electricity. The variable speed can be set to a lower speed for tasks such as water circulation which in turn leads to greater energy efficiency and lower electricity costs over time.
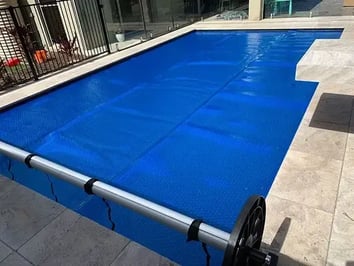
A worthwhile investment is a pool cover. Like the variable speed pump this is an initial upfront cost, however overtime the savings are significant. A pool cover such as a Daisy cover reduce evaporation which in turn reduces the amount of chemicals required and water to top the pool up. It’s also a great idea to have a pool cover to prevent debris entering the pool which reduces the cleaning costs of the pool.
Conclusion
Building a DIY plunge pool on a budget is an exciting and rewarding project that will allow you to take the ultimate staycation! With careful planning and a clear idea on the type of DIY plunge pool that best suits you, you can create a resort in your own backyard without breaking the bank. Whether you decide to tackle the project yourself or opt for an all in one installation package, comparing quotes from various pool installers or trades ensures you get the best value for your money. The key to maintaining your DIY plunge pool on a budget lies in adopting long-term savings strategies. Investing in pool covers and energy-efficient equipment will help you enjoy a sparkling pool without incurring unnecessary expenses in the long run.
With these budget-friendly tips and a bit of dedication, your dream of having a plunge pool can soon become a reality. Start planning and create a little slice of paradise at home – a place where you can relax, create memories and make a splash for years to come!


